Here’s a good rabbit hole for you:
- How do you make nice looking furniture? You add crisp insets and bevels.
- How do you add those to furniture stock? You get a handheld router.
- How do you do that precisely? You mount the router upside down into a table.
- How do you build that table? You design it in 3D.
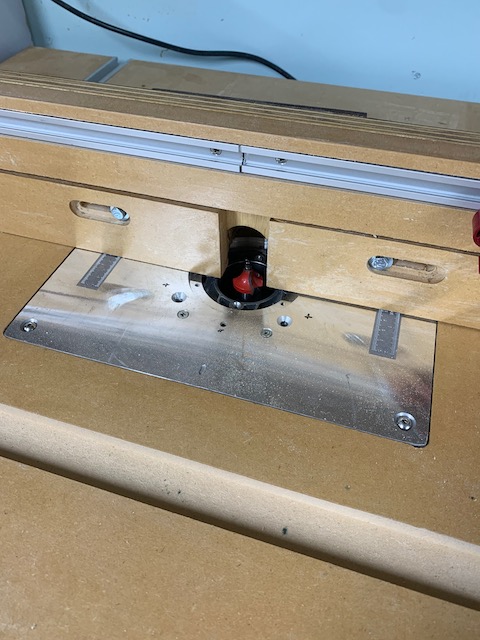
- How do you mount that router in the table? You buy an aluminium insert plate.
- How do you attach the router to that plate? You drill very accurate mounting holes.
- How do you drill those holes? You buy a drill press.
- How do you mount that drill press? You build a stand
- How do you make precise insets for that stand? You build … a router table.
As a software developer, I have a sense of appreciation for the recursion that is building furniture. Judging by Youtube content, the majority of woodworking is devoted to building useful tools and jigs that help you build actual stuff.
I like digitally planning clever things and then building them in the real world. This started with multiple standing desks, where I’m still using the latest iteration after eight years. With more garage space, it was time for what is probably a rite of passage for aspiring woodworkers: A router table. And because I like a challenge, it should have space for my contractor table saw as well.
Planning
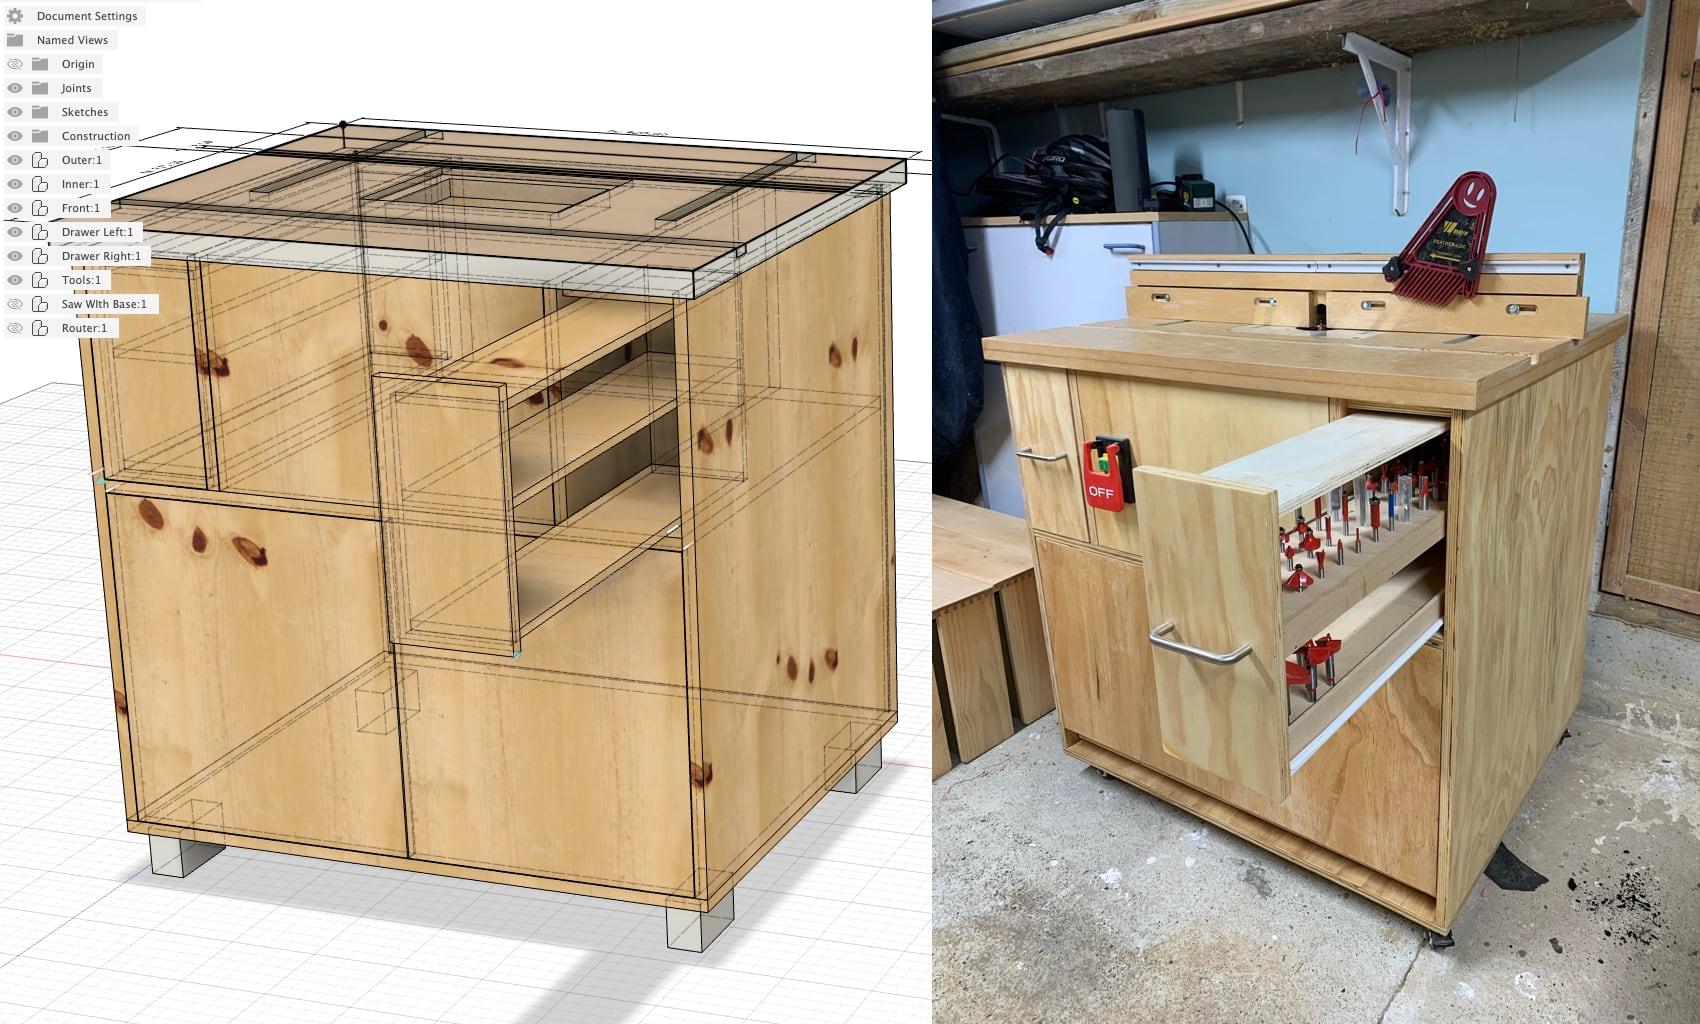
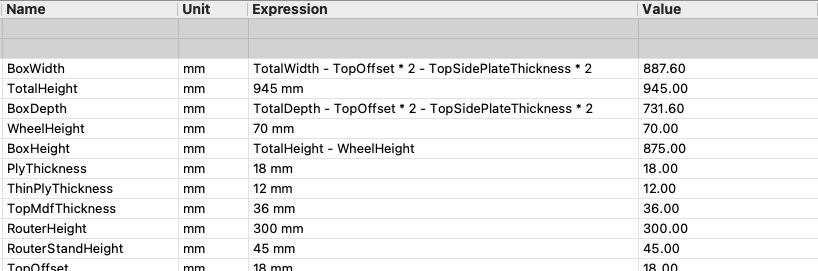
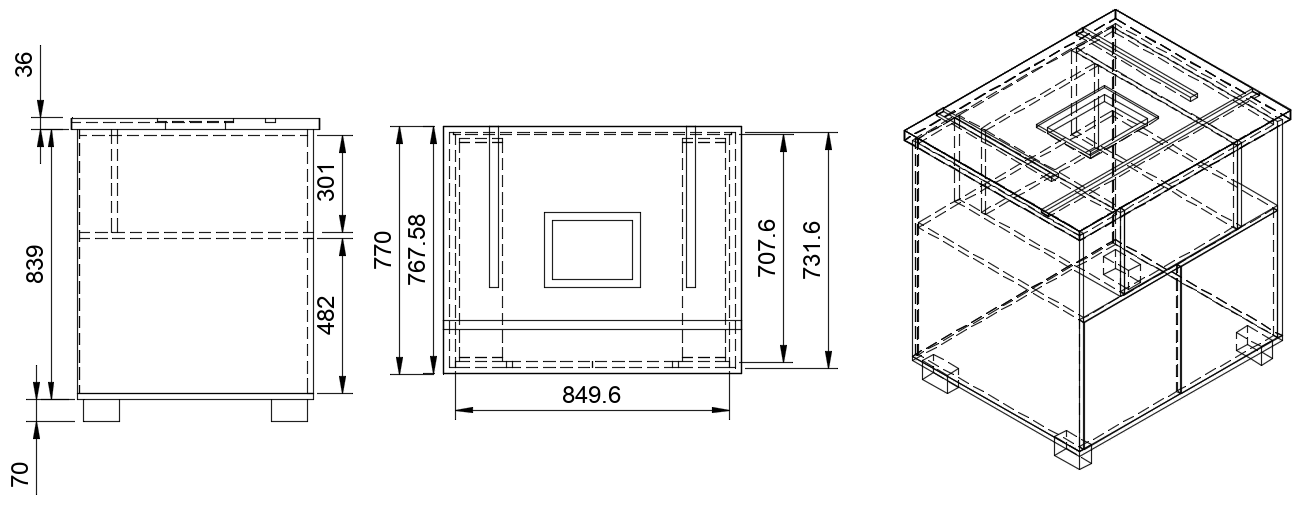
I decided to ditch Sketchup in favour of Fusion360. Sketchup has a very intuitive way to extrude geometric shapes into the third dimension, but I’ve found out the hard way that it sucks if you want to change anything afterwards. Fusion360 is a professional CAD software with a generous free tier, and allows me to parameterise and constrain the design (with the help of this brilliant Youtube tutorial). As an example, parameters enabled me to change my mind about the plywood thickness at the last minute.
In addition to visualising the result before wasting lots of plywood on wrong cuts, it’s also a great way to plan out the build with your own assembly plans. Take that, IKEA!
With a commercial extension called MapBoards, I even managed to autogenerate a cut list for the sheet goods. This can be done manually, but is quite a lot of work for larger builds, and tends to lead to wasted (expensive) material. Take that, Bunnings!
You can check out the Fusion 360 model online.
Building
I wish my build was as tidy and perfect as this Youtube build walkthrough. In the video, a Japanese woodworker shows his process without any narration, which works surprisingly well. I might be weird, but it brings me joy to watch this guy use all of his custom tools with absolute mastery and precision.
Back in the real world of my garage, I learned a lot of things on the way:
- Plan your big cuts around the “face side” of the plywood. I ended up with some ugly black glue marks on the outside.
- Inset cabinet doors are hard. While adjustable euro-style hinges are amazing, nothing will hide an out-of-square build
- Accuracy matters more on some cuts, e.g. the “stretchers” that pull a box square. “Sneak up” on those cuts in multiple passes.
- Check for square regularly, and make sure pocket screws don’t pull stock out of square. I’ve got fancy aluminium angle clamps for this now.
- Cheap drawer slides (rollers rather than bearings) are just not worth it, they have too much play for crisp padding on inset drawer faces.
- Wipe-on polyurethane (with some thinner) is far easier to apply than using a brush with full strength
Result
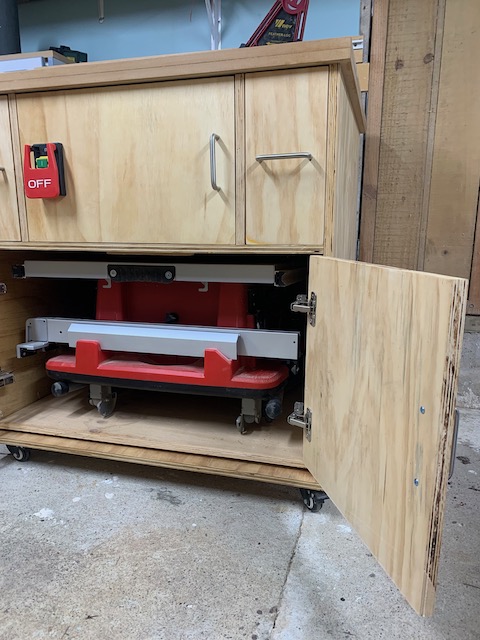
I’m pretty stoked with how it turned out. It’s a solid table for many years to come. You don’t want to skimp on the assembly when there’s a sharp bit spinning at 19,000RPM.
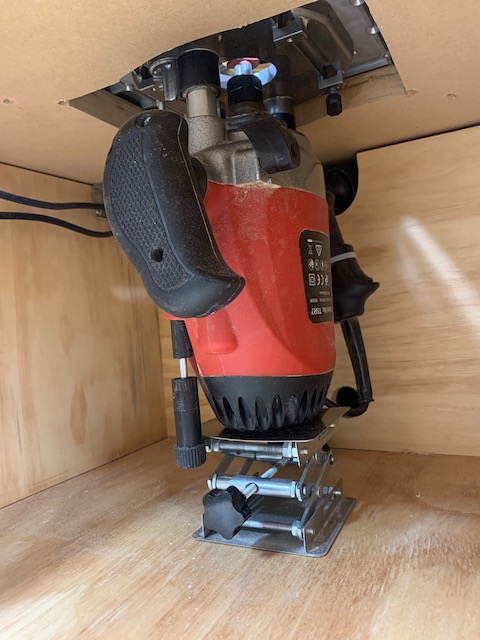
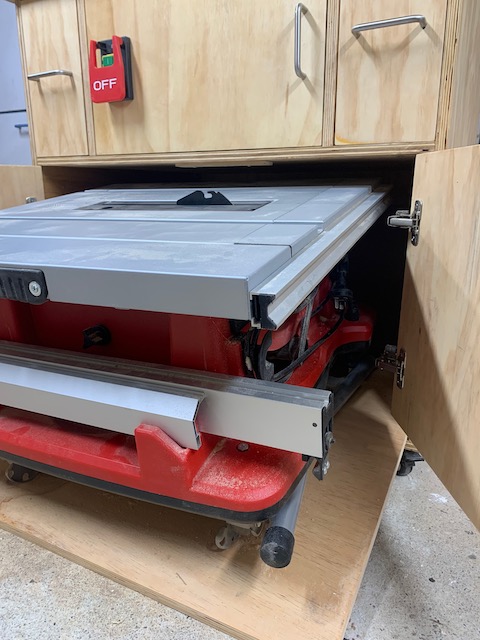
Proper router lifts and fixed-based routers are extremely expensive (>$1000), so a $20 mini scissor platform as a router lift is my favourite hack in the project. And I can stash away my table saw in less than a minute.
Many hours of scrolling through Aliexpress and months of (weekend) building later, I was able to round over five pieces of nice Matai wood for the base of our fire place. But oh boy, just wait until we ever need custom picture frames! It’s kind of the perfect metaphor for web development tooling these days.